|
amortization.com Ltd. 905-639-0374
|
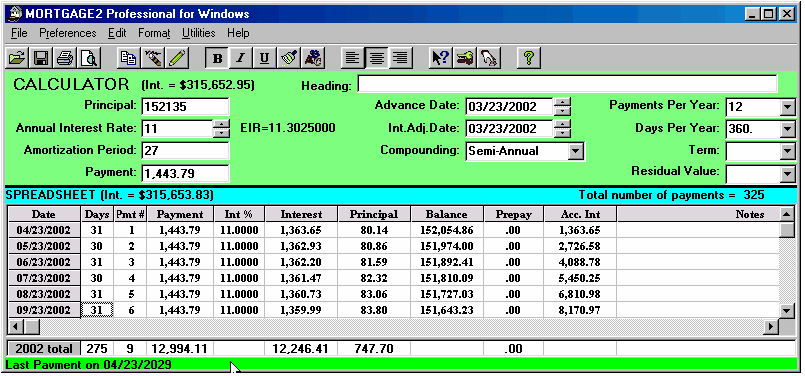
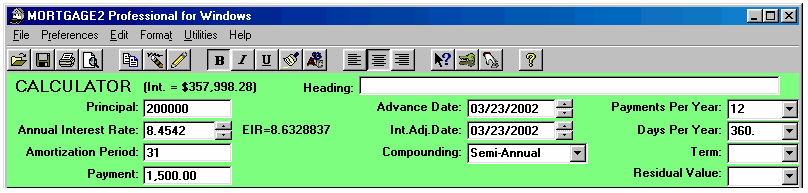
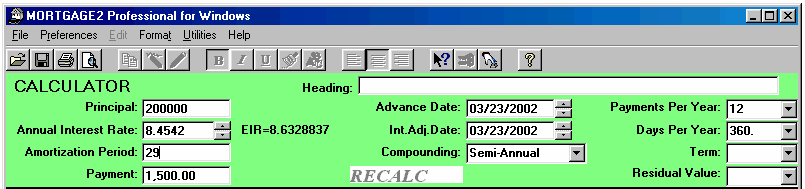
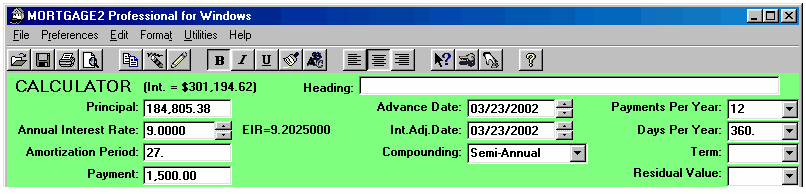
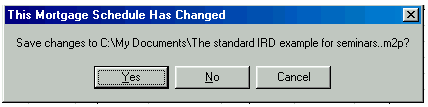
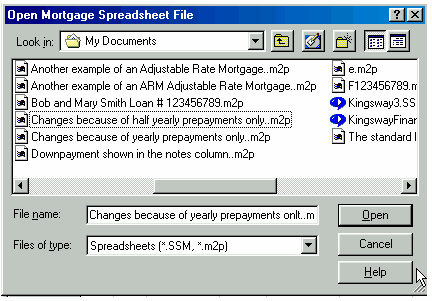
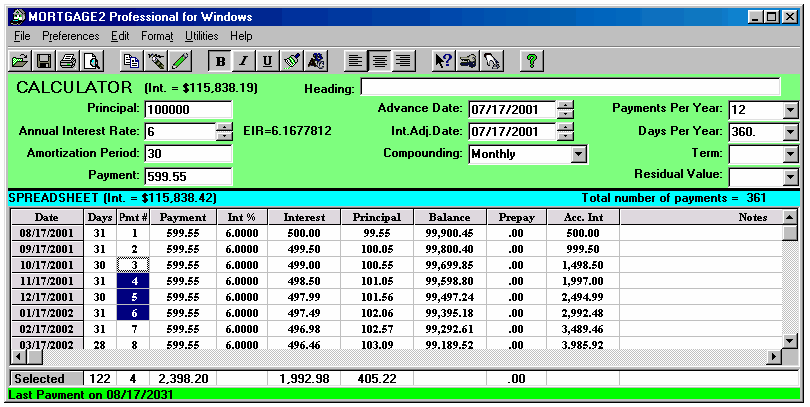
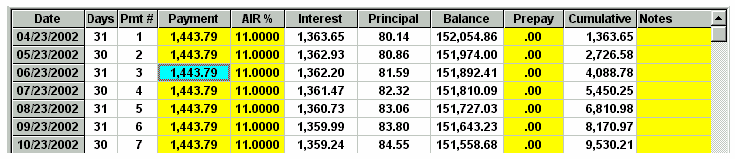
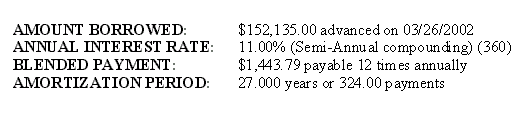
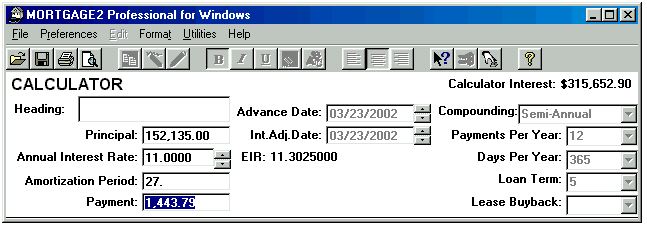
Click here for a Quick Reference Sheet The main screen starts with default information in the CALCULATOR and an amortization schedule SPREADSHEET based upon the default information in the CALCULATOR. Each time new information is entered in the CALCULATOR the SPREADSHEET will automatically generate a schedule based upon the new information. When you first run the program the cursor will be in the Principal box of the CALCULATOR and the background colour of the box will be blue. To move from box to box to change information press the tab key. The tab key moves you forward and shift+tab moves the cursor backwards. Holding the tab key down will cause the cursor to move in a continuous loop in the CALCULATOR. If you change any three, of the first four CALCULATOR boxes the remaining box will be automatically recalculated. You cannot specify information for all four boxes, as that would leave nothing to be calculated. For example, what would the interest rate have to be in order to borrow $200,000 for 31 years at monthly payments of $1500??? Answer, 8.4542%. The effective interest rate (EIR), 8.6328837 is displayed to the right of the nominal rate of 8.4542%. The EIR depends upon the type of compounding selected. The interest adjustment date defaults to the advance date unless you specify a different date. The Term input box is only important if you are going to renew a mortgage before the term expires, and effects only the calculation of the interest rate differential, IRD. If you change only one of the first four CALCULATOR boxes then you must decide which of the remaining boxes to recalculate, just like any hand held financial calculator. The instant you make a change to any CALCULATOR box the RECALC message appears and the SPREADSHEET is cleared. The CALCULATOR is waiting for one of two responses. Either you are changing two more calculator boxes or you are going to recalculate one of the remaining boxes. To recalculate a box, click on the box and press the F6 key or click on the prompt message in front of the CALCULATOR box. Both methods recalculate the information, in that box and the RECALC message will disappear. The SPREADSHEET will again appear with appropriate information. For example, what if you wanted the amortization period to be 27 years and pay $1500 per month at a 9% interest rate, how much Principal could you borrow?? Answer, $184,805.38 When the SPREADSHEET contains the appropriate mortgage information you can save the schedule. If the file/schedule you were making changes on already had a name you can click on File, Save and it will be saved with the changes. If you try to exit the spreadsheet before saving your spreadsheet changes you will be prompted by the message; If you are working on a new file/schedule (making changes) you can save it as a file with a unique name by clicking on; File, Save As. Your amortization schedules can be saved with meaningful names which will make it easier to recall when opening spreadsheet files as shown below;
HOW
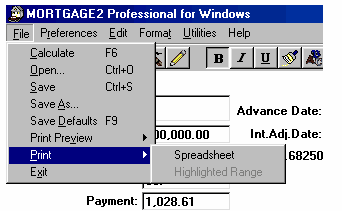
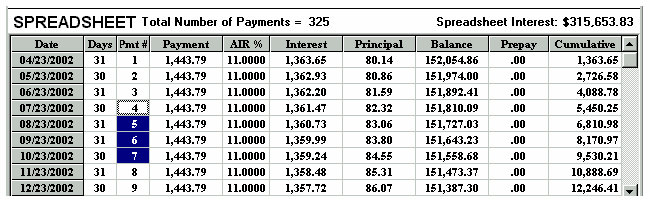
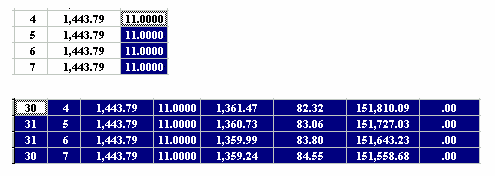
TO PRINT A SCHEDULE Clicking on Spreadsheet selection will print the entire schedule. Clicking on the Highlighted Range will only print the range of cells that were highlighted prior to clicking on File, Print For example, to print the schedule for payments 4, 5,6 and 7 click on cell 4 and press the shift plus the down arrow until 5,6 and 7 cells are highlighted, then go click on the, File, Print, Highlighted Range You do not need to highlight the entire area of the schedule, .. just the four payments of concern in any of the columns. Any method of the highlighting below would have achieved the same result.
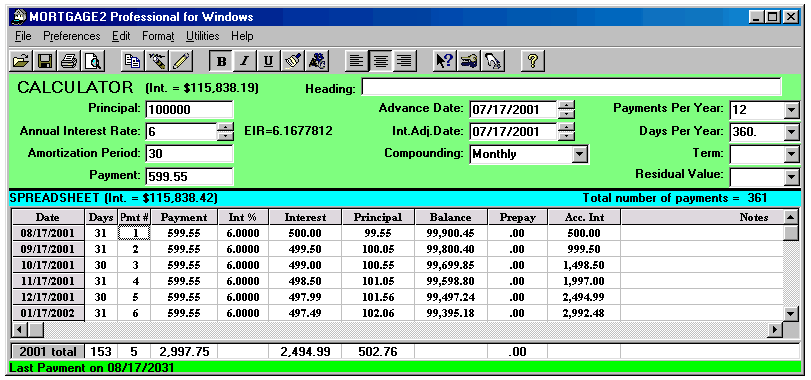
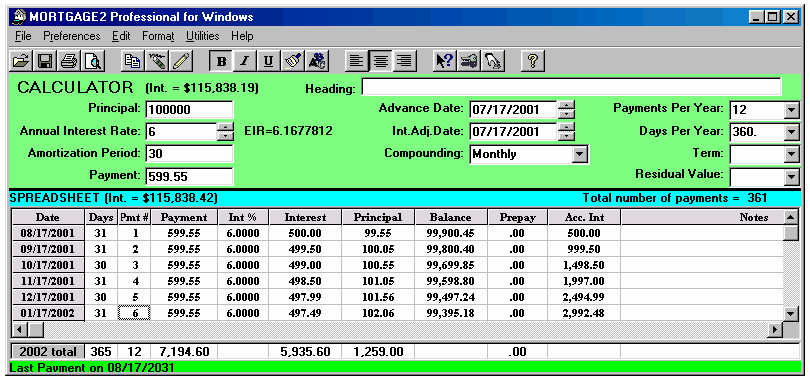
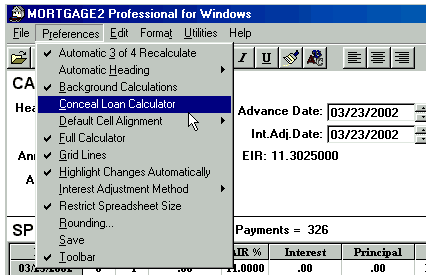
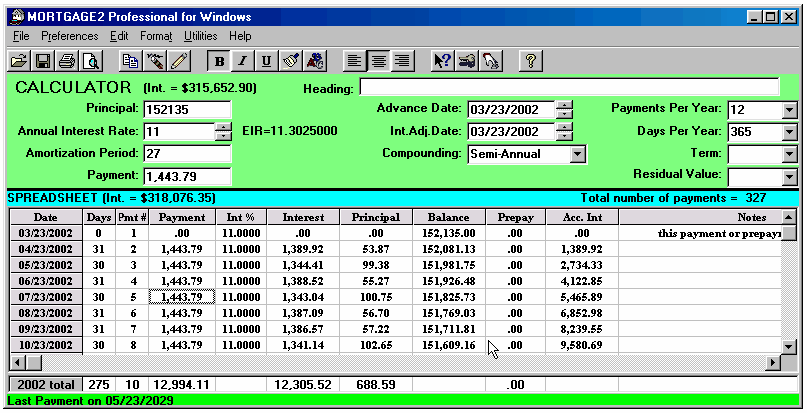
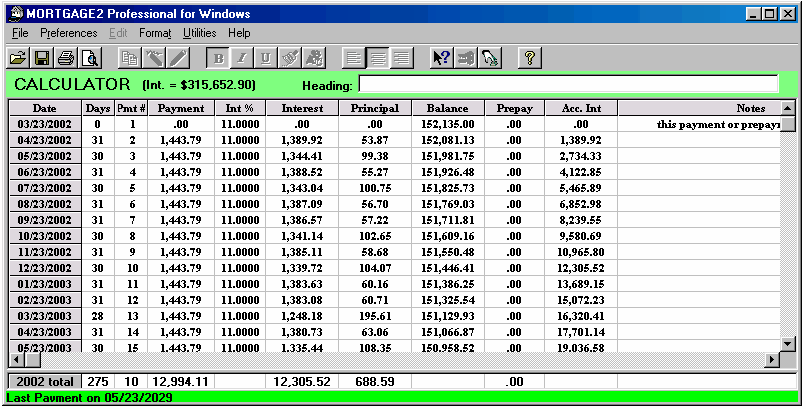
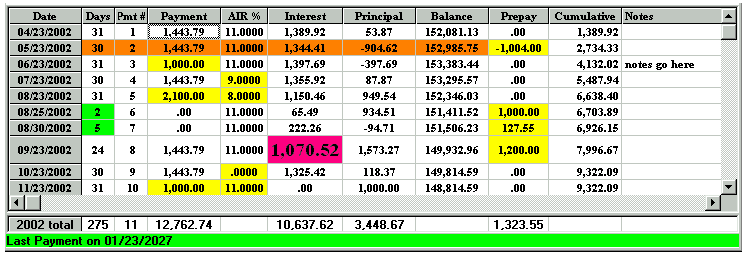
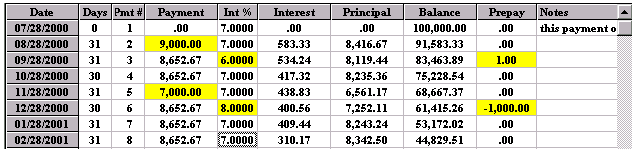
Working in the SPREADSHEET 1.. highlight an area prior to printing 2.. to make changes to a schedule 3.. to highlight a part of a column for its totals (clicking and highlighting with the mouse) For example, the amount of principal paid in 2001 is shown below as $502.76 on the 2001 Total line at the bottom of the SPREADSHEET because one of the cells (Pmt#1) was clicked by the mouse. And if you click using the mouse on Pmt#6 cell in the year 2002 the total line shows the yearly totals on the 2002 total line. The sub totals for payments #3 to #6 are shown on the Selected line at the bottom of the SPREADSHEET. Using the mouse you can highlight any area you wish for subtotals. Once you make changes to a schedule there is no reason to go back to the CALCULATOR as the CALCULATOR now only serves as a reference point. To avoid confusion you could go to the Preferences Menu and click on, Conceal Loan Calculator. The CALCULATOR would disappear. All you need to do is click on the first payment of the SPREADSHEET and click on the yellow pencil icon to insert an extra payment and you have the schedule below is simplified; (Screenshot 14) The spreadsheet contains all the information needed to be self explanatory (the compounding will be shown in the heading when it is printed). Payment #1 is "Days 0" and payment #2 is really the first payment due one month after the advance date of 03/23/2002. Once a SPREADSHEET cell is clicked on, the tool bar displays the icons that are active, by changing from grey to a colour. The cell you click on will display a fuzzy border as shown in the third payment below (powder blue). The only way to exit the spreadsheet is to click on any of the 11 calculator cells. The ENTER key enters your new information and moves you down to the next cell. If no information is entered, pressing the ENTER key moves you down one cell without any changes. The arrow keys are used to enter information in a cell and move in the direction pressed. Changes can only be made to the yellow coloured columns plus the Date column. Below is an example screen shot of a SPREADSHEET that shows how flexible the SPREADSHEET can be.
SELECT
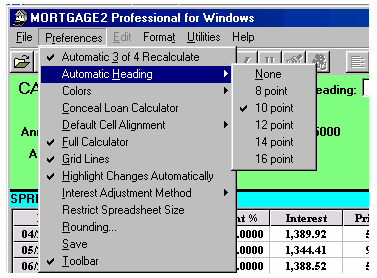
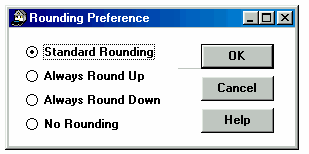
YOUR PREFERENCES Automatic 3 of 4 Recalculate: When selected on, entering any three of the first four calculator variables will automatically calculate the fourth. Automatic Heading: Check this to set the font size of your financial headings that appear on the top of every page of the schedule. Font sizes larger than 10 point will move your headings off centre. The Preference Menu above is what is usually selected (in advance) on all the downloaded files. Checking the 12 point makes the AMOUNT BORROWED in the heading of the schedule 12 point. Background Calculations: With this feature checked on, As soon as you type a change into the spreadsheet, the entire schedule is recalculated. If you were making a lot of changes in a large spreadsheet then it would save time to turn this off until all the changes are made. You could them turn it back on or just press F6 to recalculate all the changes. Colors: This lets you change colours on the five areas shown. Default Cell Alignment: This enables you to position your numbers in the amortization SPREADSHEET. The options are Centered, Left Aligned, or Right Aligned. Full Calculator: If one was going to do a lot of what if calculations utilizing the 3 out of 4 feature, then it would be much faster to turn off the full calculator. By holding down the tab key you can move in a a continuous loop in the first four calculator boxes only. The remaining calculator boxes are greyed out. Grid Lines: This turns on or off the lines for the amortization SPREADSHEET. ON - (Screenshot 23) OFF - (Screenshot 24) Highlight Changes Automatically: If one is making a lot of changes in a SPREADSHEET it is convenient to leave this feature on as it is easier to spot changes (yellow is the default colour). Interest Adjustment Method: Usually, it is best to leave it on Compounded Interest. Thus if your mortgage was calculated using semi-annual compounding the Interest adjustment would automatically be calculated using semi-annual compounding. Few Lenders use Exact Simple Interest any more for interest adjustments but the option is available to verify schedules of an earlier date. Restrict Spreadsheet Size: If you are working on a 20 year amortization period schedule and you start doing a lot zero payments the size of the spreadsheet will never grow or expand past 20 years. This feature just prevents a lot of wasted calculation time. Rounding: The choice is yours. Standard Rounding will more than likely allow your schedules to agree with most lenders. Save: ALWAYS be sure to click on the Save button before you exit the Preferences Menu, or else your preferences will not be saved. Toolbar: The choice is yours. Have this checked to enable the icons above the CALCULATOR. ON - (Screenshot 27) OFF - (Screenshot 28)
|
amortizationdotcom Mortgage Calculator for iPhone Introduction to Canadian and American Mortgages Seminar on prepaying principal (Part A) Seminar on prepaying principal (Part B) Global TV Interview regarding 40 Year Mortgages
Look for this logo on the Apple Store!
|
||||||||||||||||||||||||||
<
Go Back |


